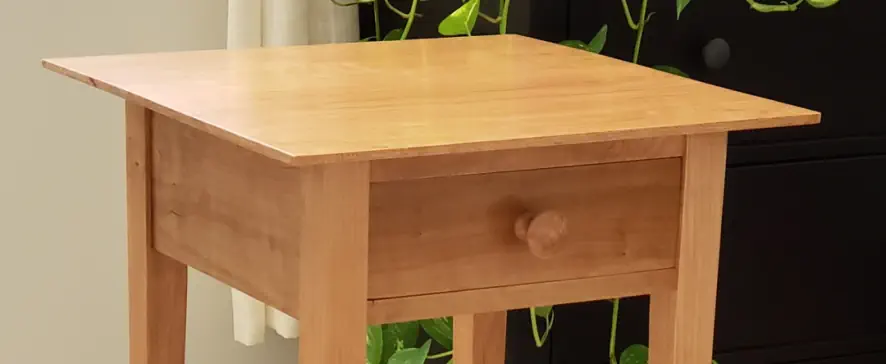
Woodworking is a hobby of mine and I enjoy every aspect of it… well not really, things are great until you mess something up and spend countless hours and days fixing them. And then there are moments when you are about to do something that you have never done before and start worrying about how to build Shaker End Table so that you would not have to start all over when things go wrong.
Here is how I built Shaker End Table in one of the woodworking classes at Charlotte Woodworkers Association. I did not intend to make it a blog out of this work so I did not take a lot of pictures and video. This is great project to learn various more advanced joints like mortise and tenon, half blind and through dovetail.
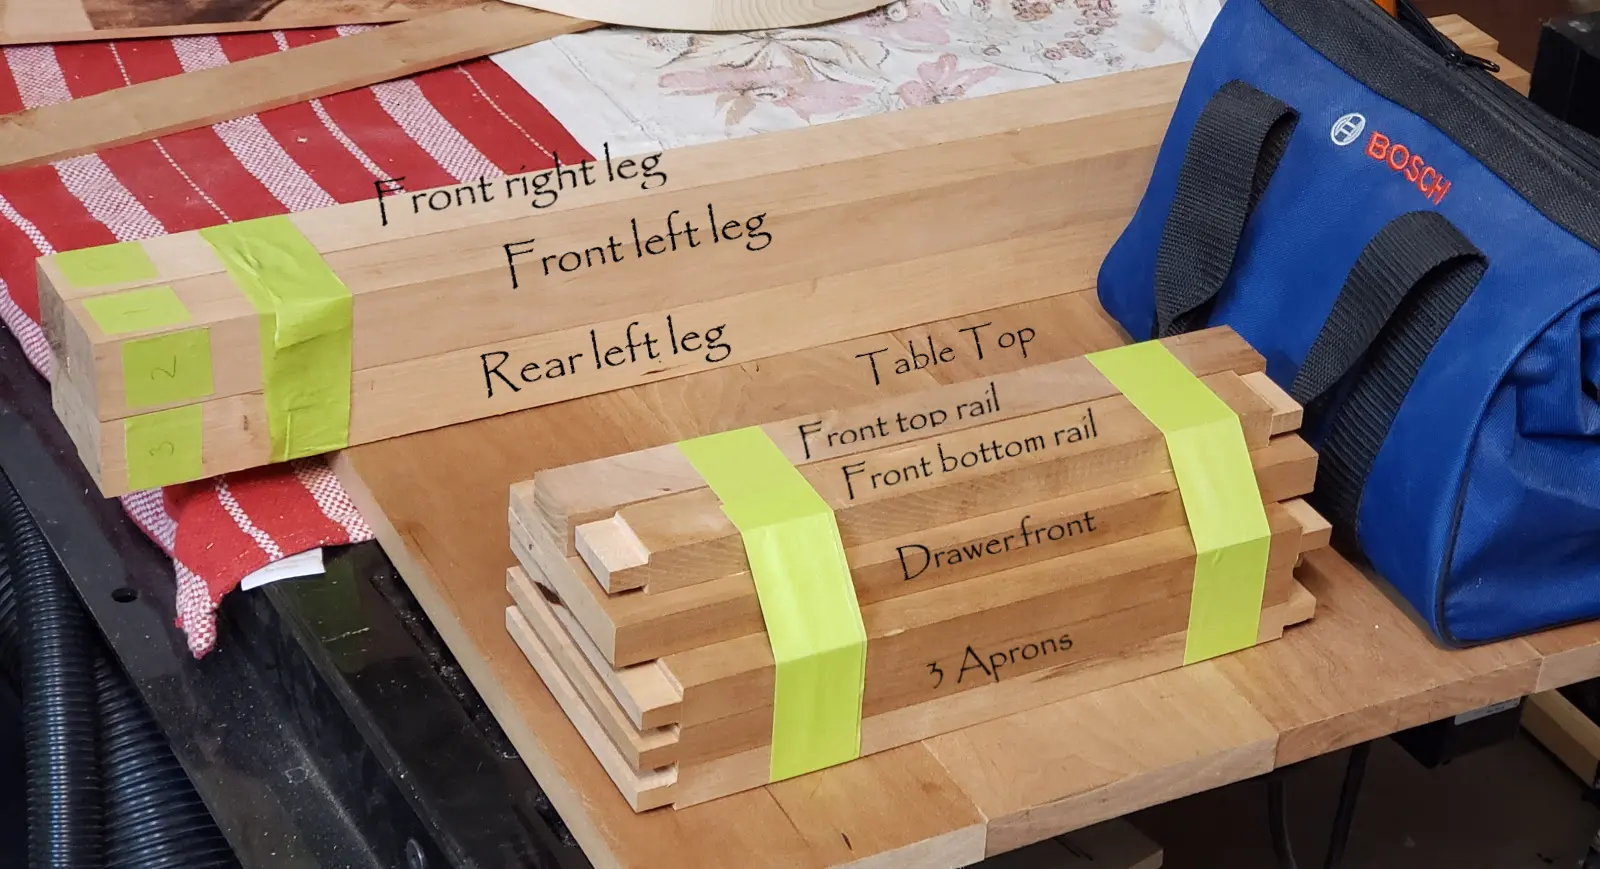
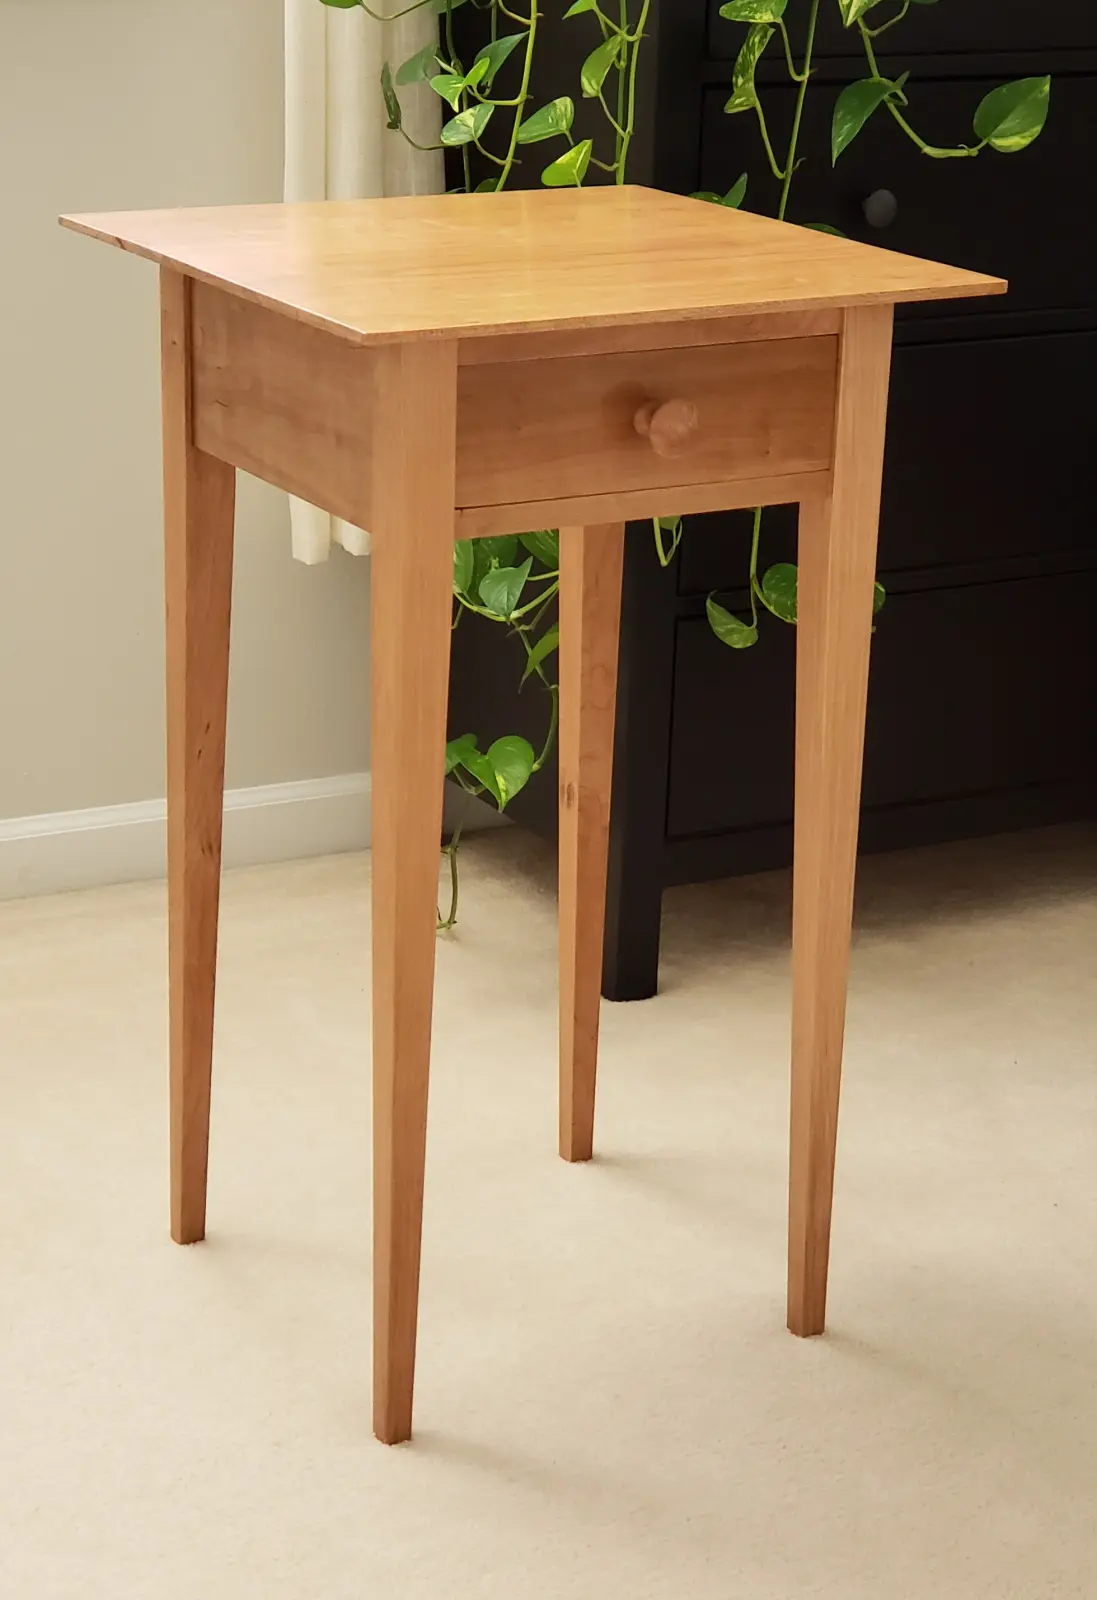
The story of this marvelous, 28 piece, project in pictures begins where boards have already been dressed – wood has been jointed, planed and cut to the right width and length. Mortises were made using mortising machine and tenons were partially cut with table saw jig.
List of parts needed to build Shaker End Table
| Part | Quantity | Material |
|---|---|---|
| Legs | 4 | Cherry |
| Apron | 3 | Cherry |
| Top | 1 | Cherry |
| Front top rail | 1 | Cherry |
| Front bottom rail | 1 | Cherry |
| Drawer Glides | 4 | Poplar |
| Drawer spacers | 2 | Poplar |
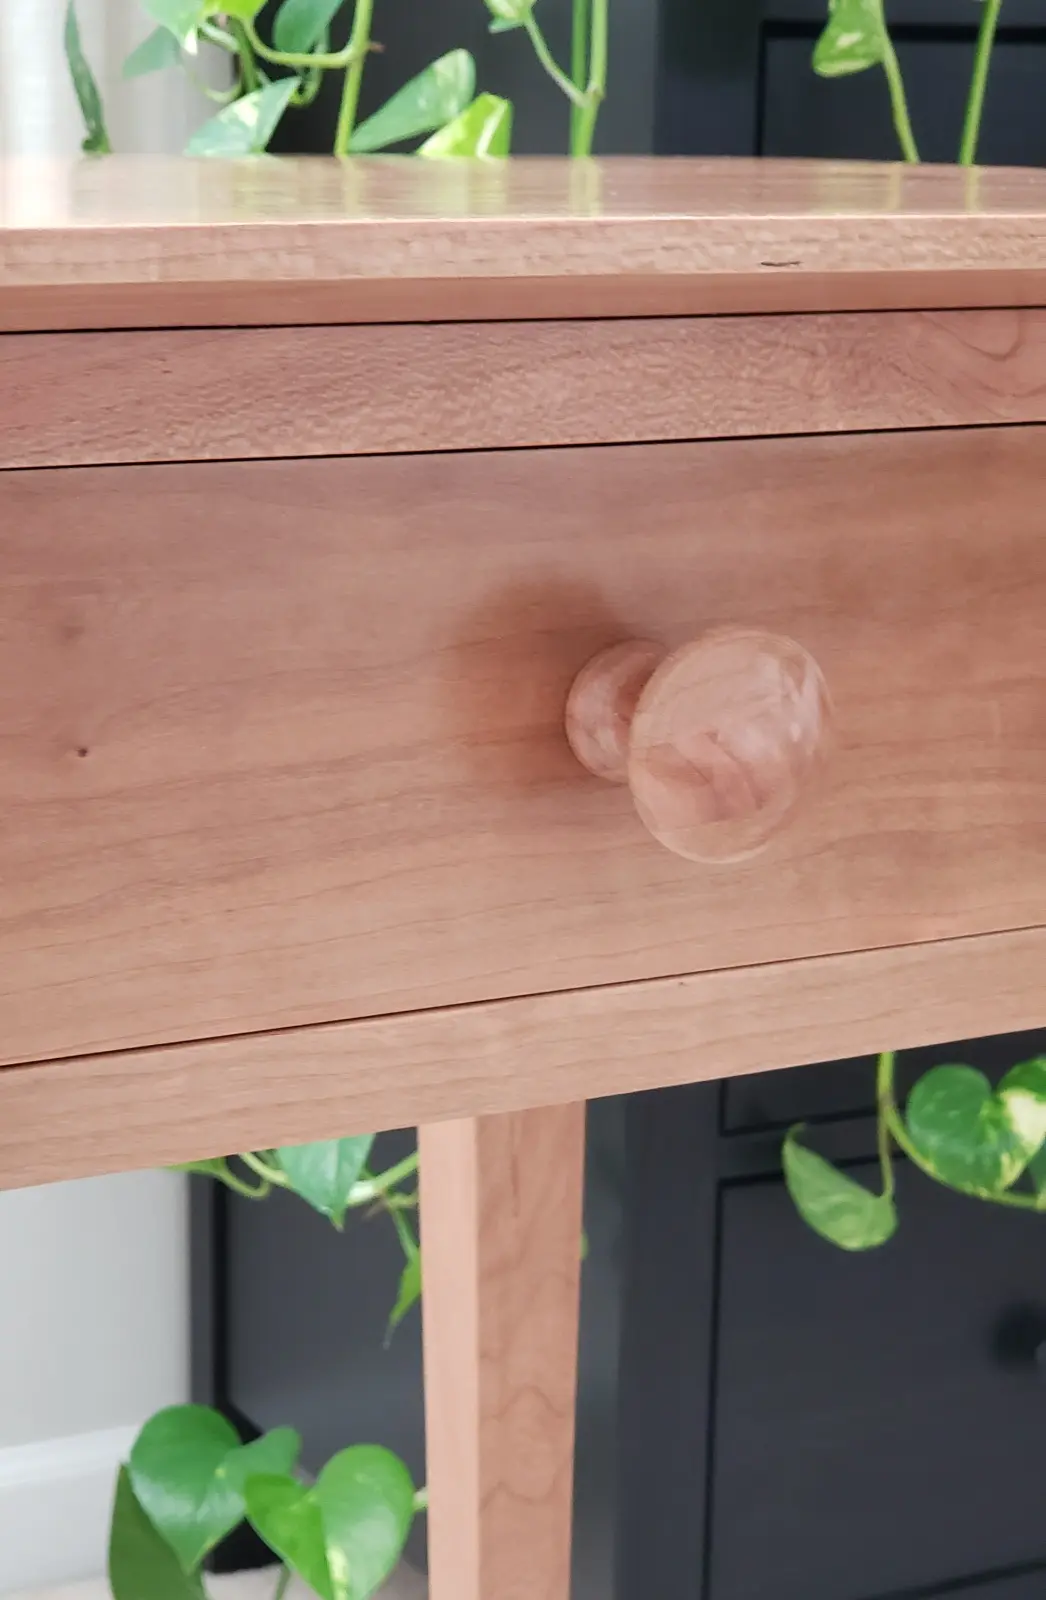
| Drawer front | 1 | Cherry |
| Drawer sides | 2 | Poplar |
| Drawer back | 1 | Poplar |
| Drawer bottom | 1 | Poplar |
| Drawer knob | 1 | Cherry |
| Screws to secure top | 4 | Wood screws |
| Drawer knob screw | 1 | Wood screw |
| Drawer bottom screw | 1 | Truss head screw |
I learned a few tricks for marking pieces which needed to go together. Using masking tape and writing numbers on masking tape instead of directly writing on the wood helps with less clean up work needed later. Also numbering pieces of wood the way they needed to be assembled/connected to each other helps easier identify how you intended these pieces to be connected. Here is a good example of how it is easy to assemble a project having a good marking technique.
A pile of marked pieces
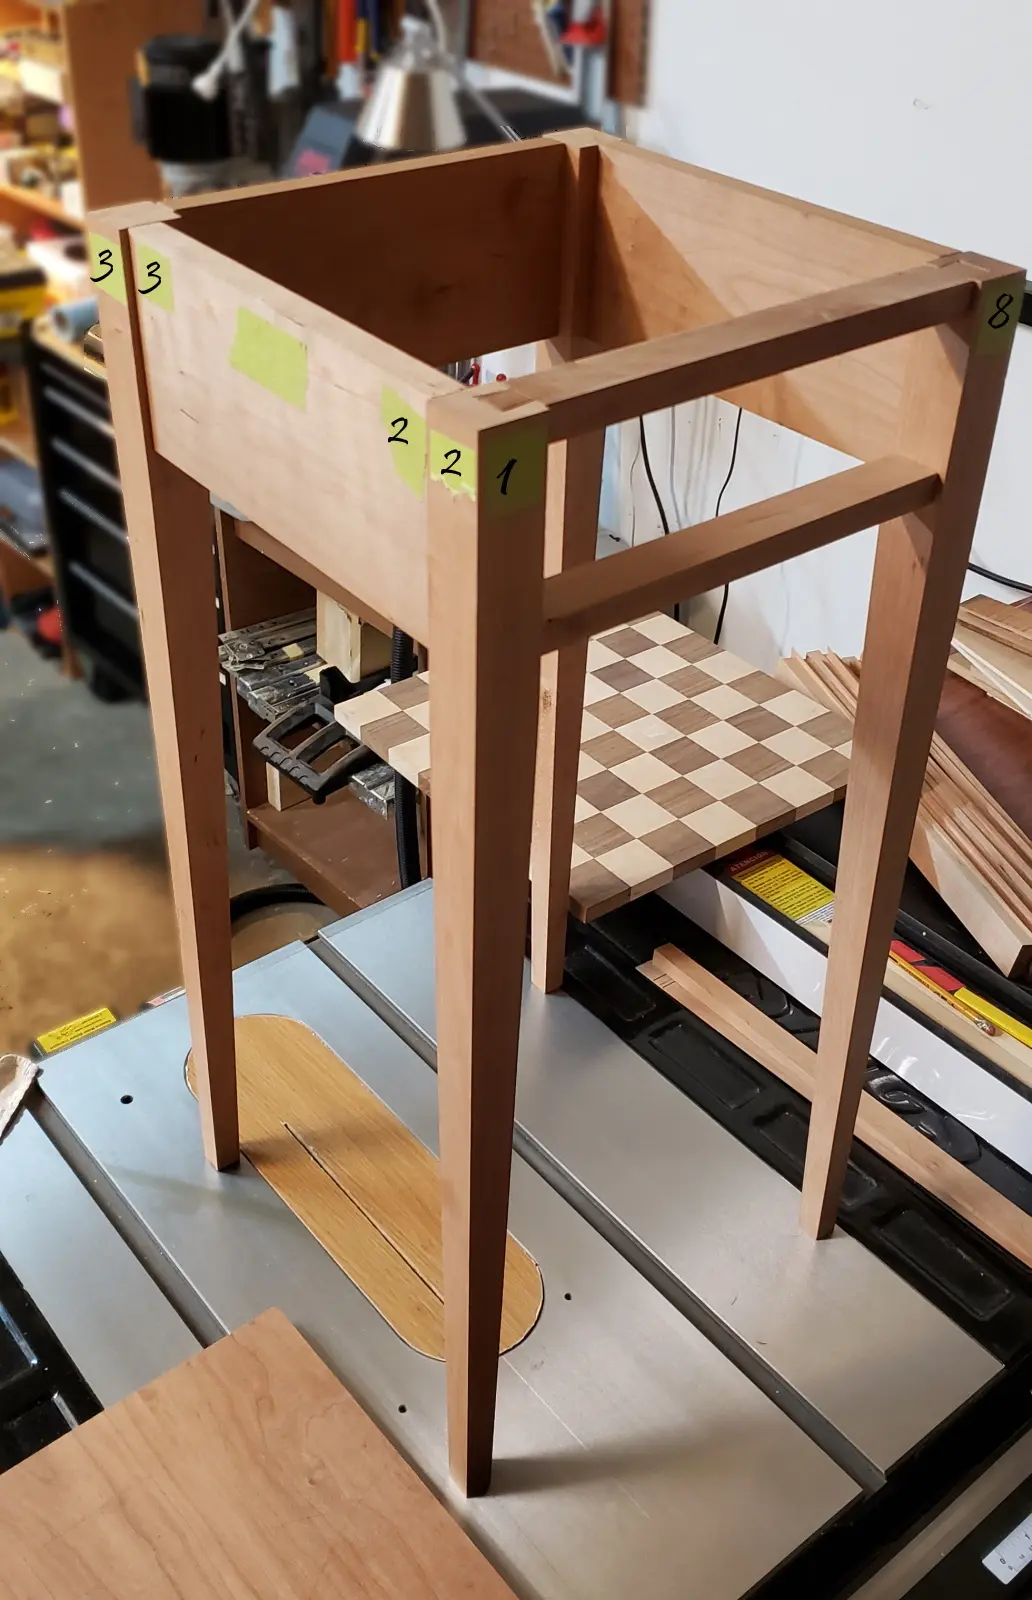
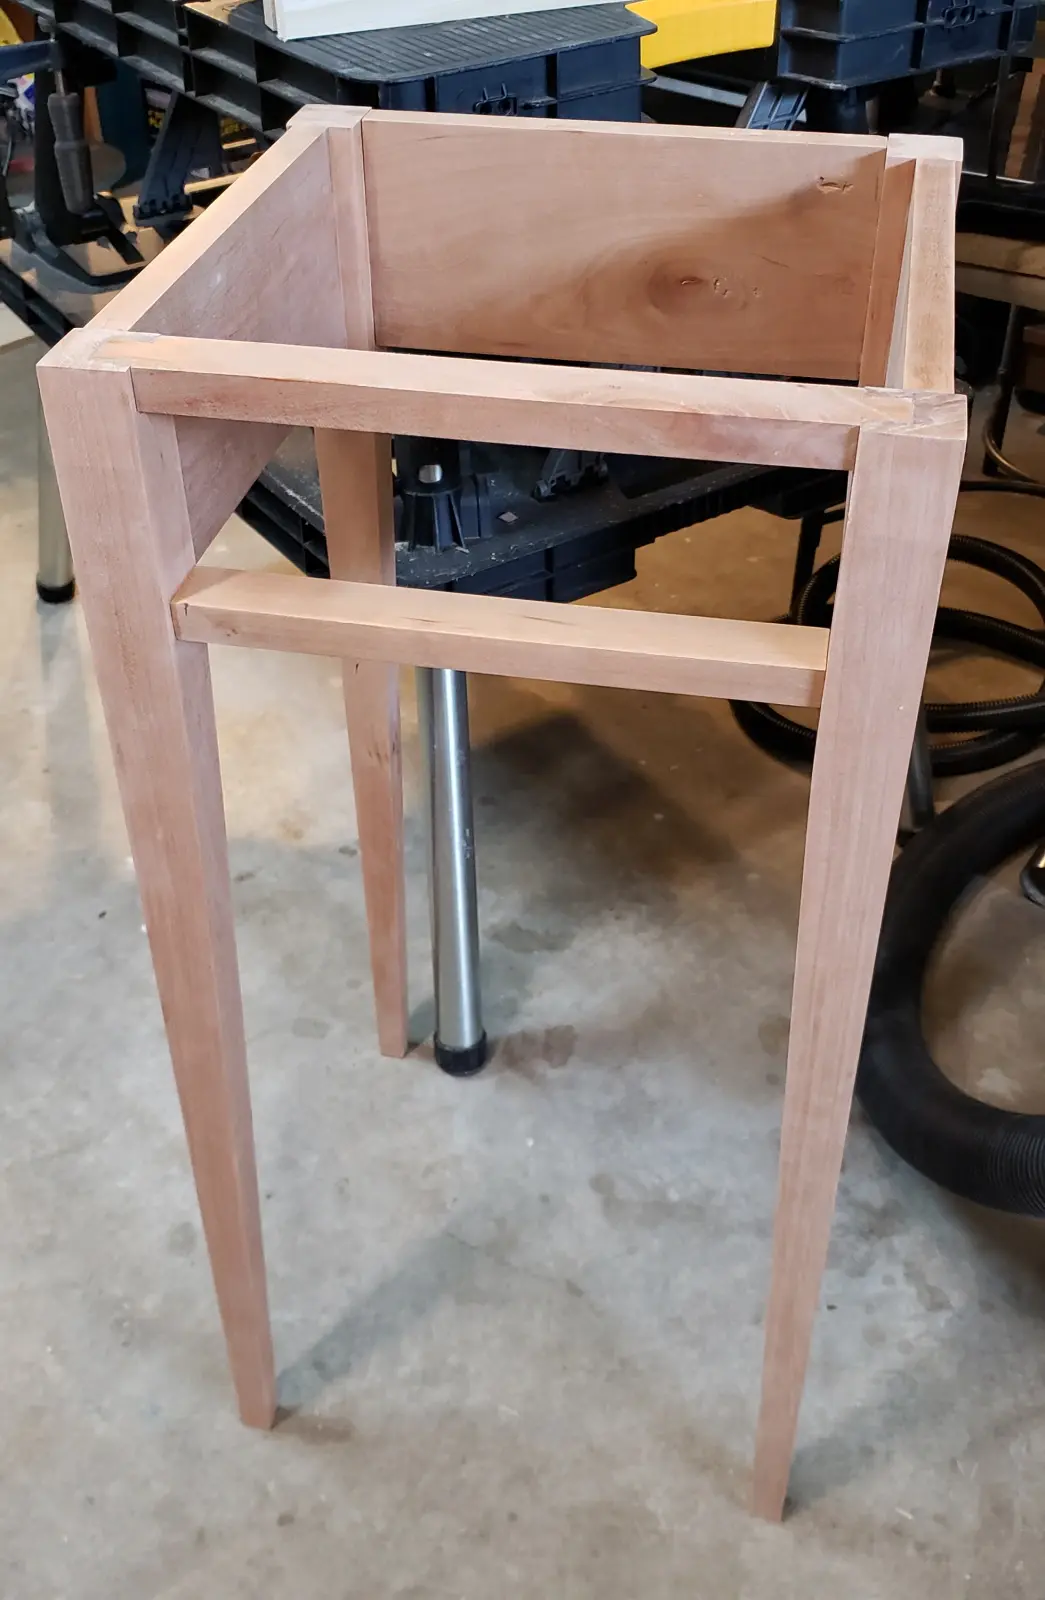
Assembly of Shaker End Table
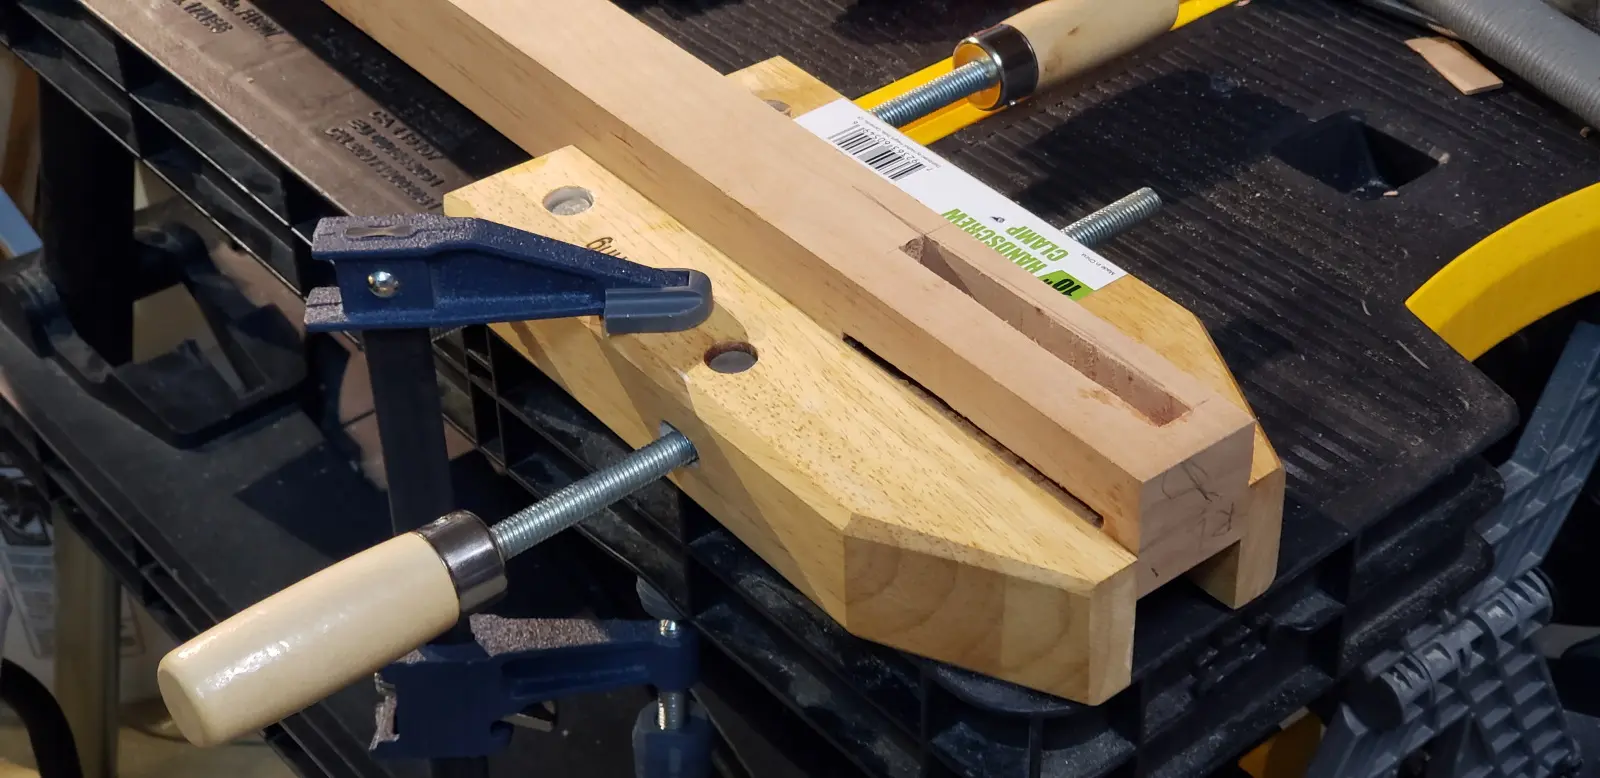
It sure is nice to have a heavy workbench with heavy duty quick release front vise. But when you don’t have one a hand screw clamp works just fine it just takes a bit longer to clamp a piece.
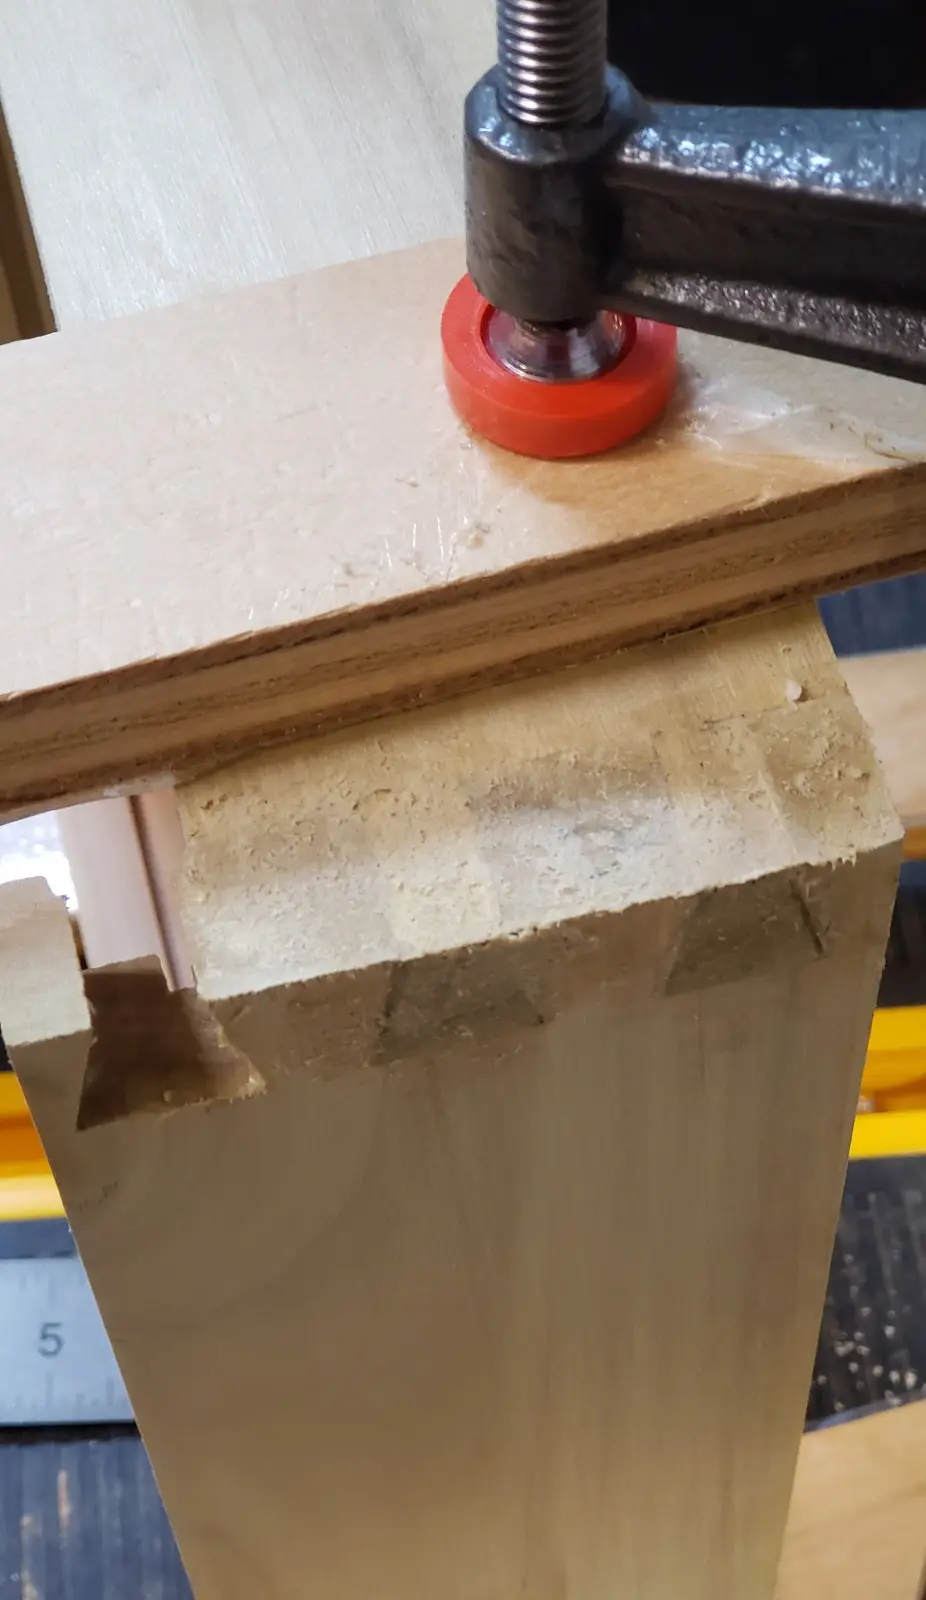
Cleaning up tenon of the aprons
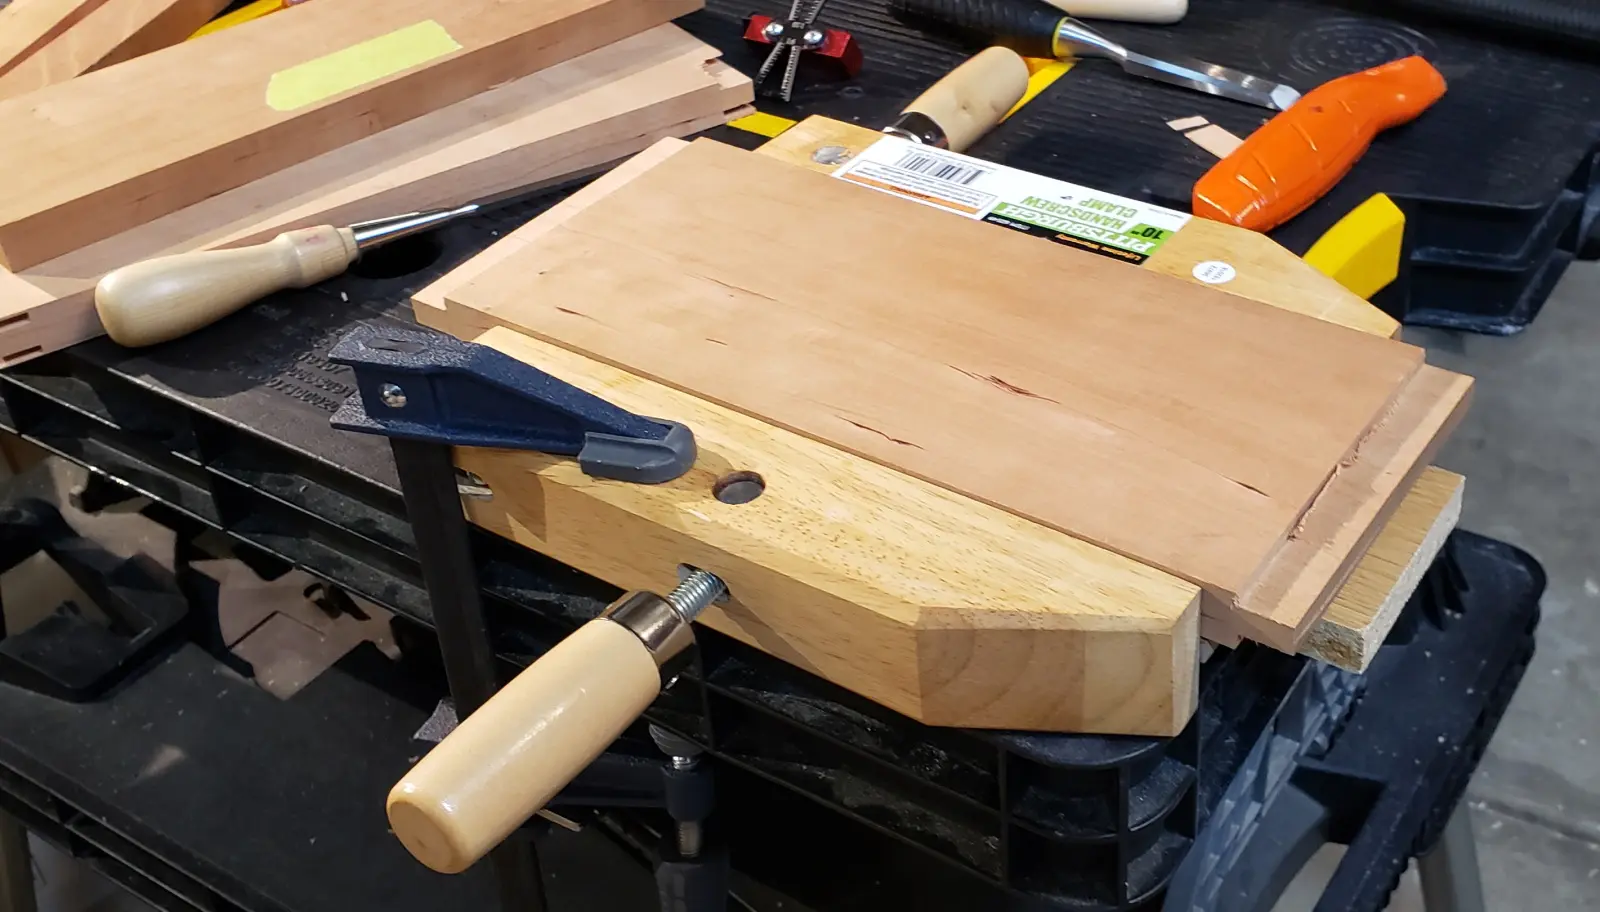
Cleaning up mortises the legs
Building Shaker End Table Drawer
Halfblind dovetails were cut using dovetail jig and tails of through dovetails where also cut with dovetail jig but pins were hand-cut due to misalignment of the boards when I was cutting them. Lesson learned – make sure that boards are absolutely square when using dovetail jigs!
Dovetail marker is a key tool when it comes down to perfect dovetail joinery. I have used this Dovetail Marker and I strongly recommend it. I is a precise dovetail guide with four different slope rations(1:5, 1:6, 1:8 and 1:10) .
Here are a few pictures of drawer in progress of gluing up – yes, looks ugly at first, there were gaps that I filled up with sawdust and glue:
But once glue dried and I have sanded it a gazillion times it turned out to be perfect. One lessen learned here too – do not mix grain when trying to patch holes or it will be very evident that it was repaired (I have mixed grain direction in the left picture):
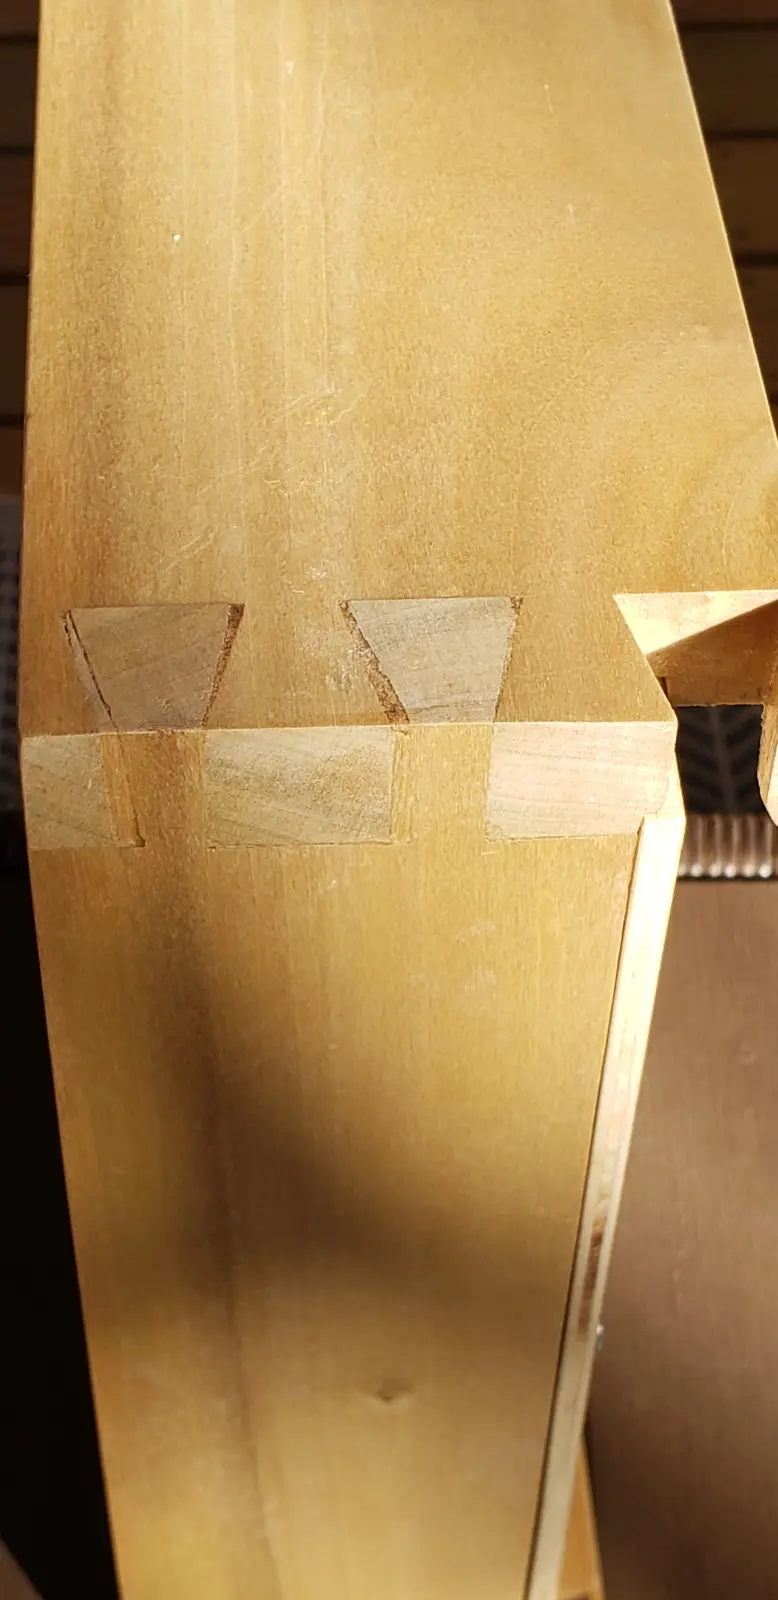
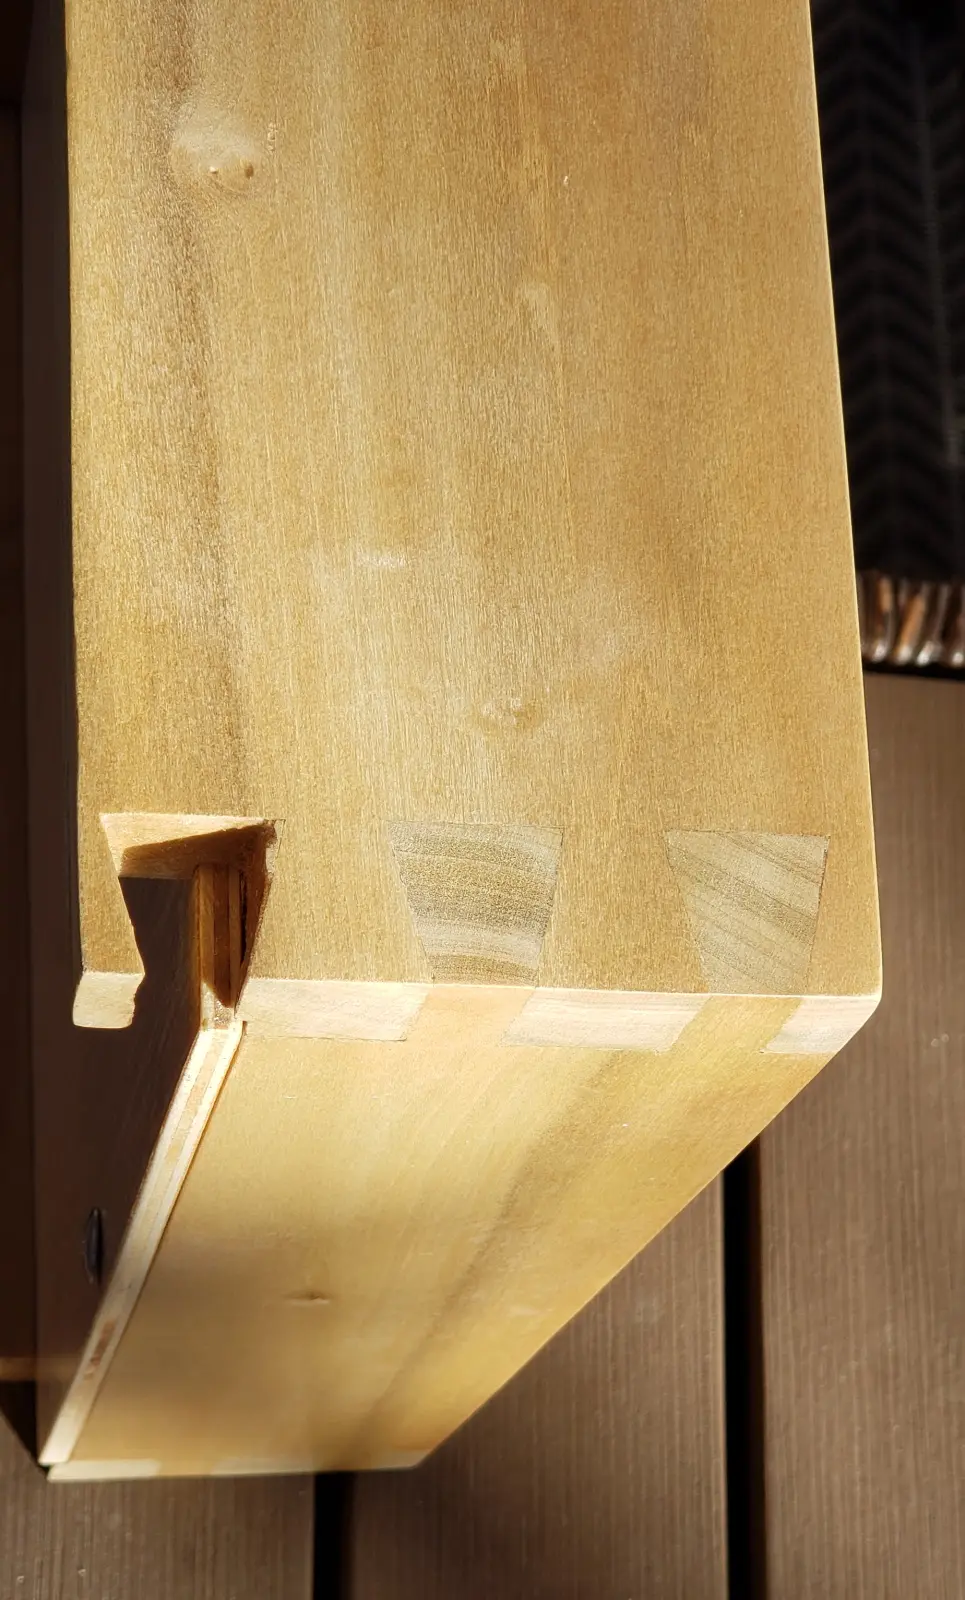
I know… these dovetail joints look awesome, even I am proud of myself…
Tabletop was cut square using a crosscut jig on a table saw and then the edges of the bottom part of the tabletop were bevel cut by setting the blade of the table saw at an angle (~15°) and using a vertical jig that slides on top of the table saw fence.
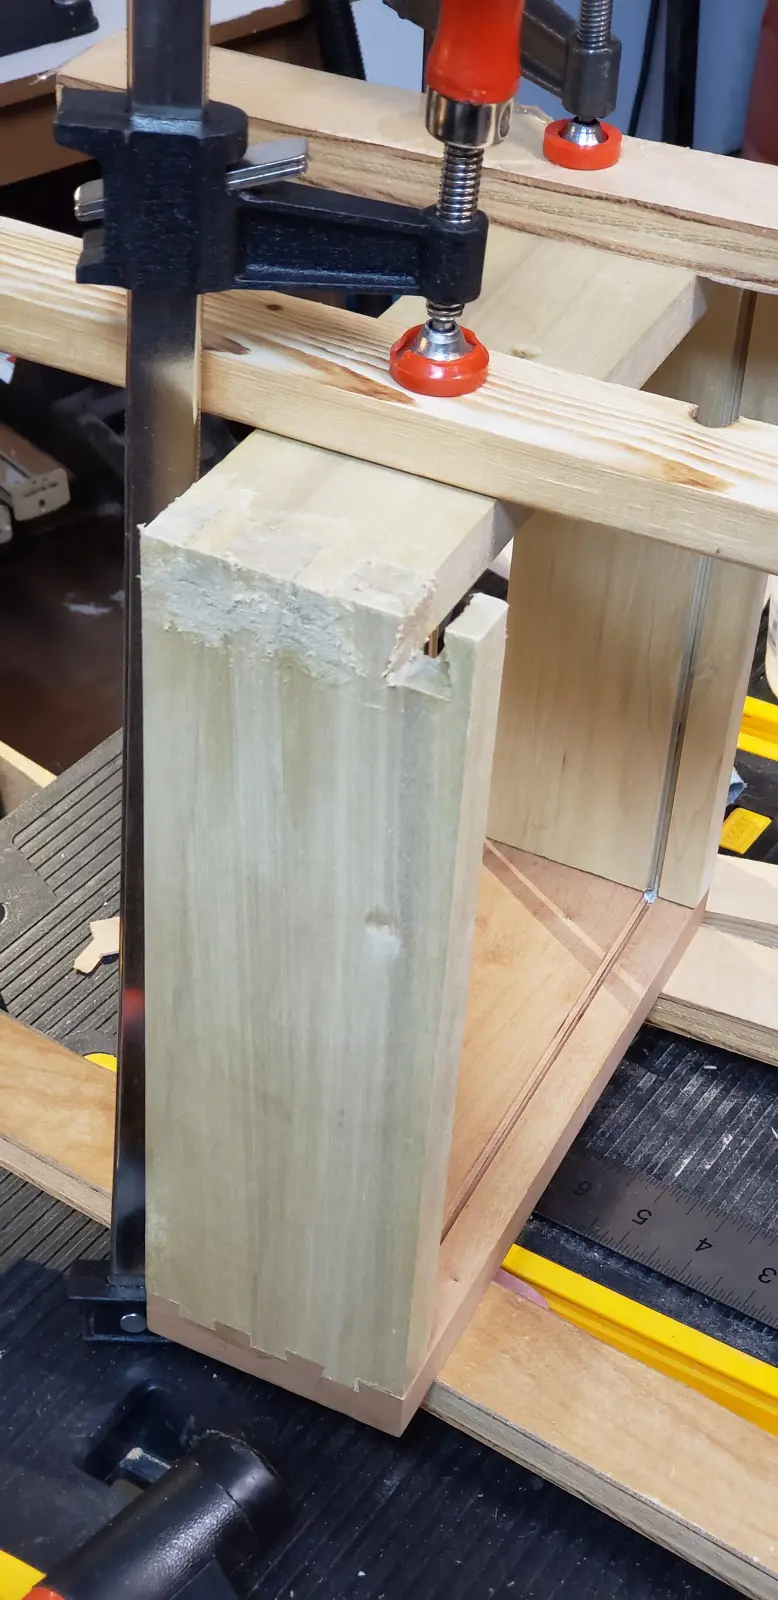
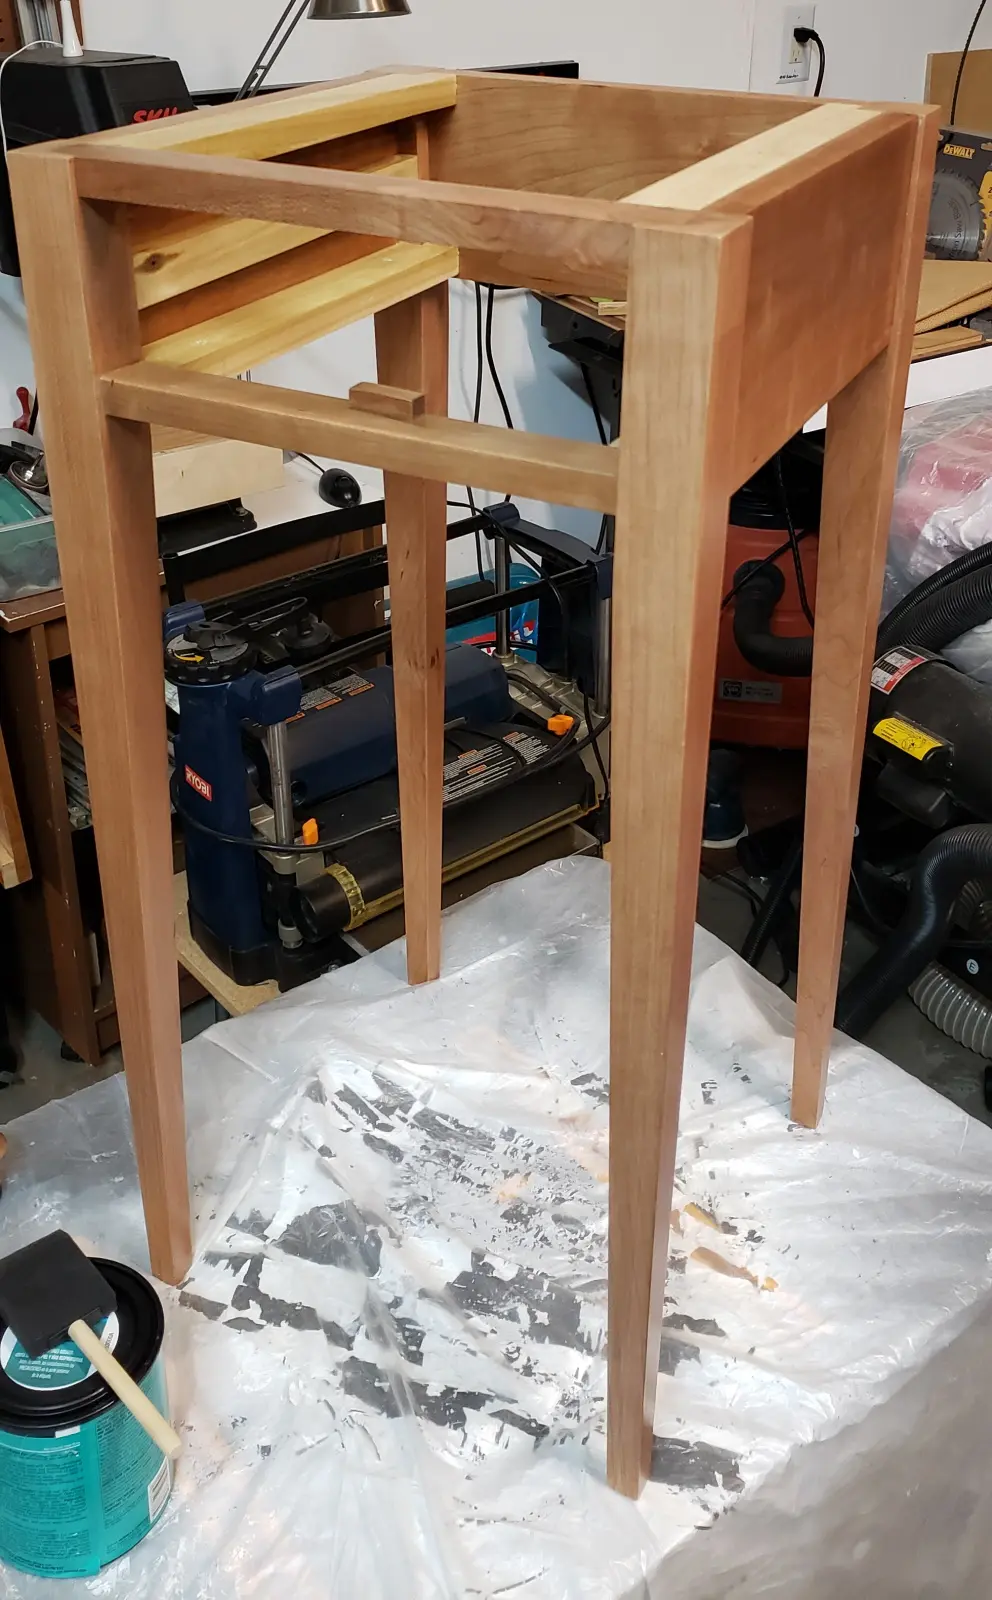
Once all the pieces were cut, cleaned up, it was time for dry-fitting all the pieces together followed by a lot of additional clean up and sanding and many other dry fitting attempts. No matter how many times I was leaning up and sanding tenons and mortises the table would still look crooked or however you want to call it. Then I learned yet another lesson – make sure that when you cut tenons using a jig it is perfectly adjusted to cut parallel to the sides of your board.
So I finally fixed aprons and its tenons, then cut dovetail on front top rail and glued all pieces together:
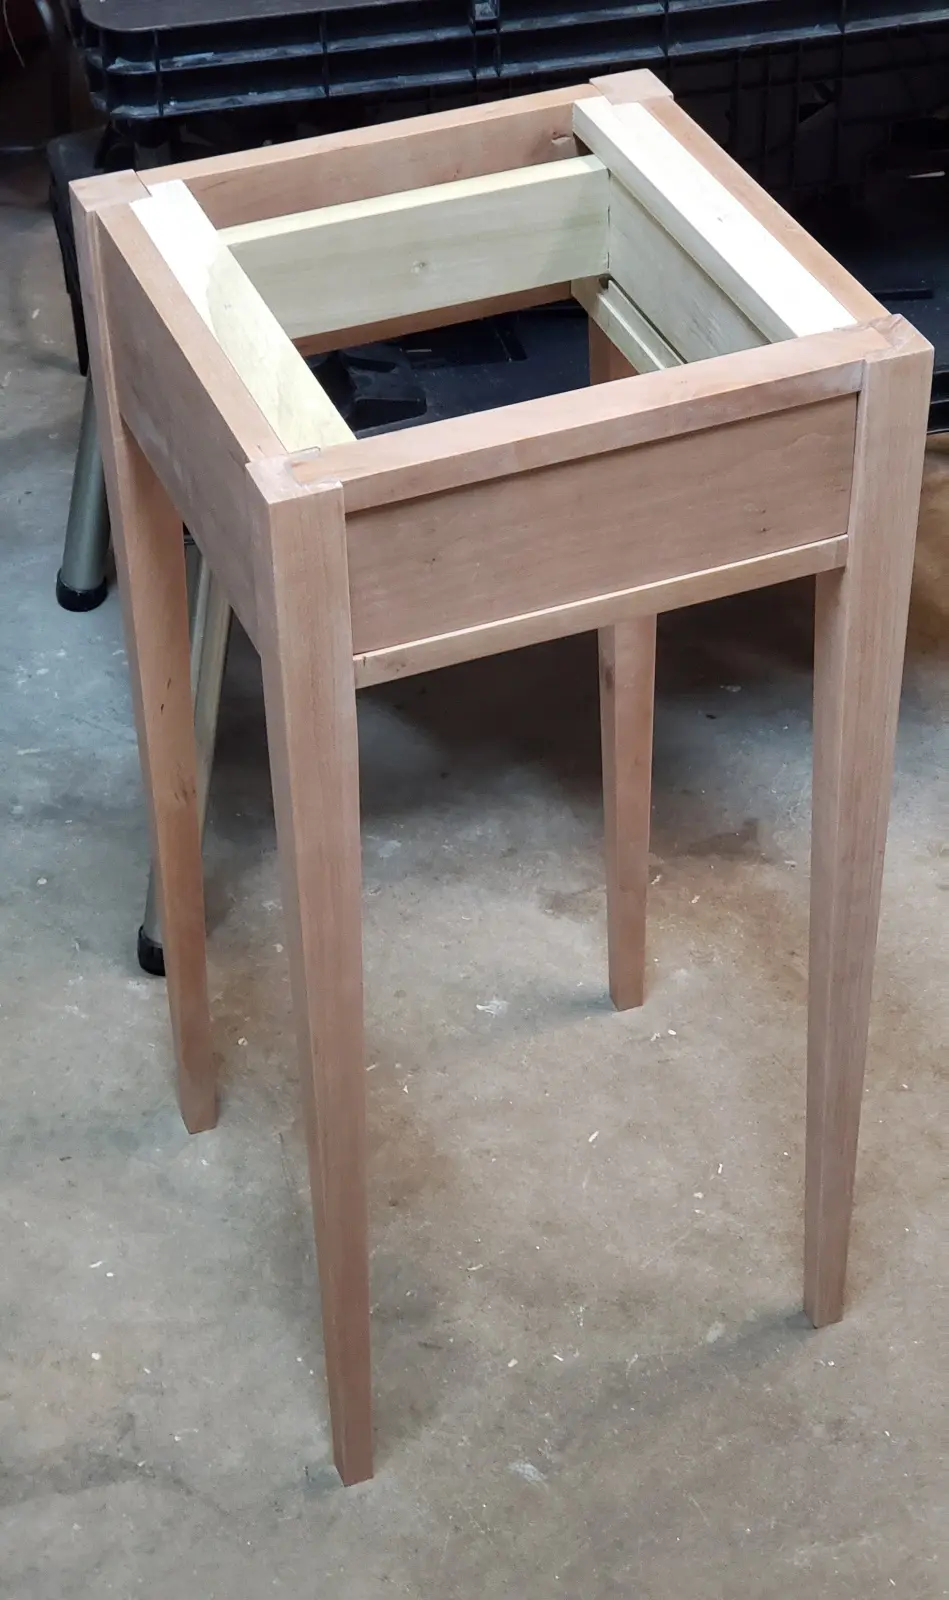
Attaching tabletop to the frame
Tabletop was attached to the frame with wood screws:

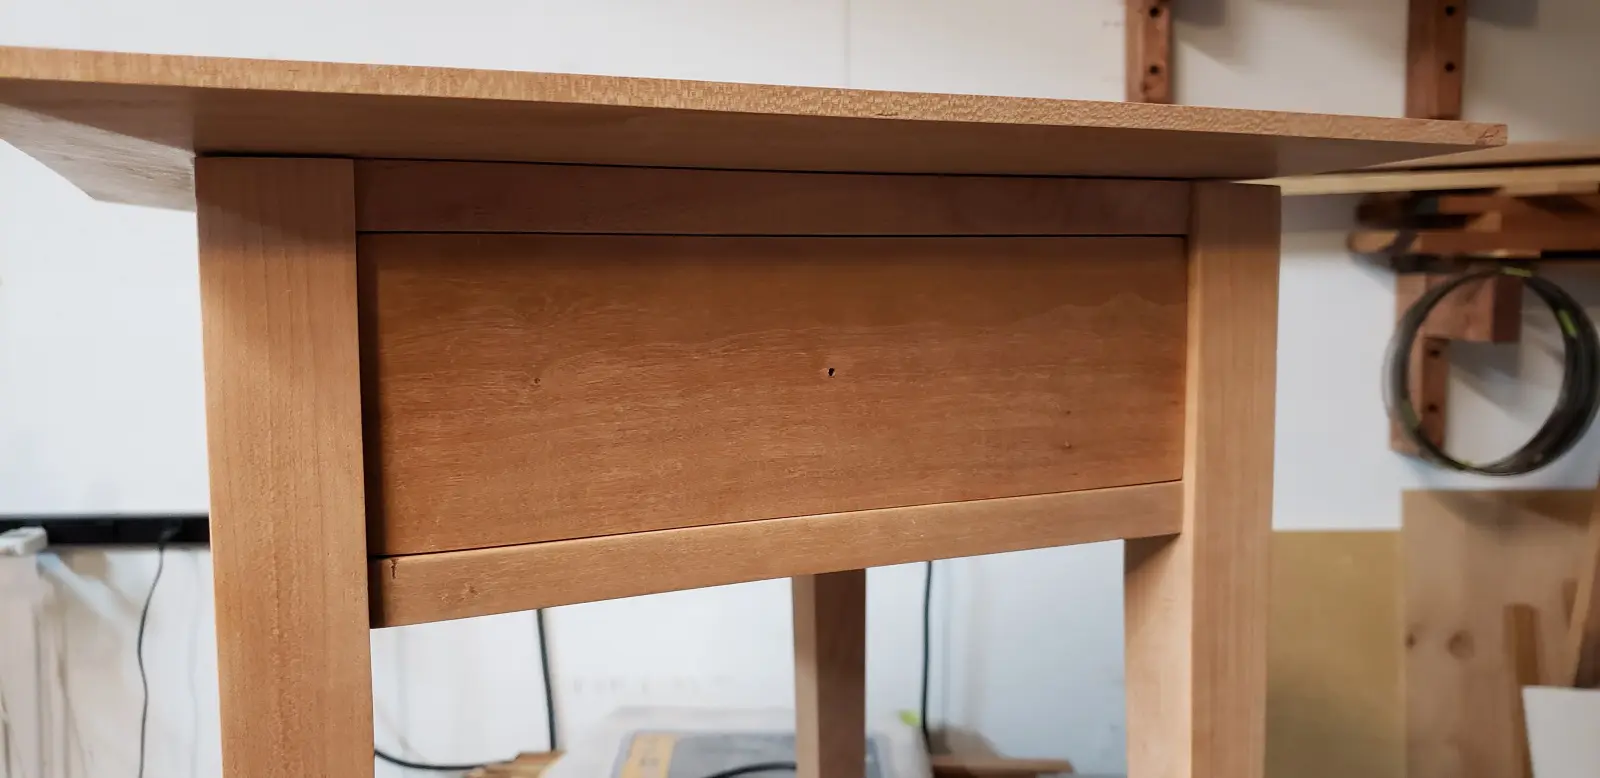
Fitting Shaker End Table Drawer
Then it was time for testing how the drawer slides in. And of course it did not slide all the way in and then there was a lot of sanding again.
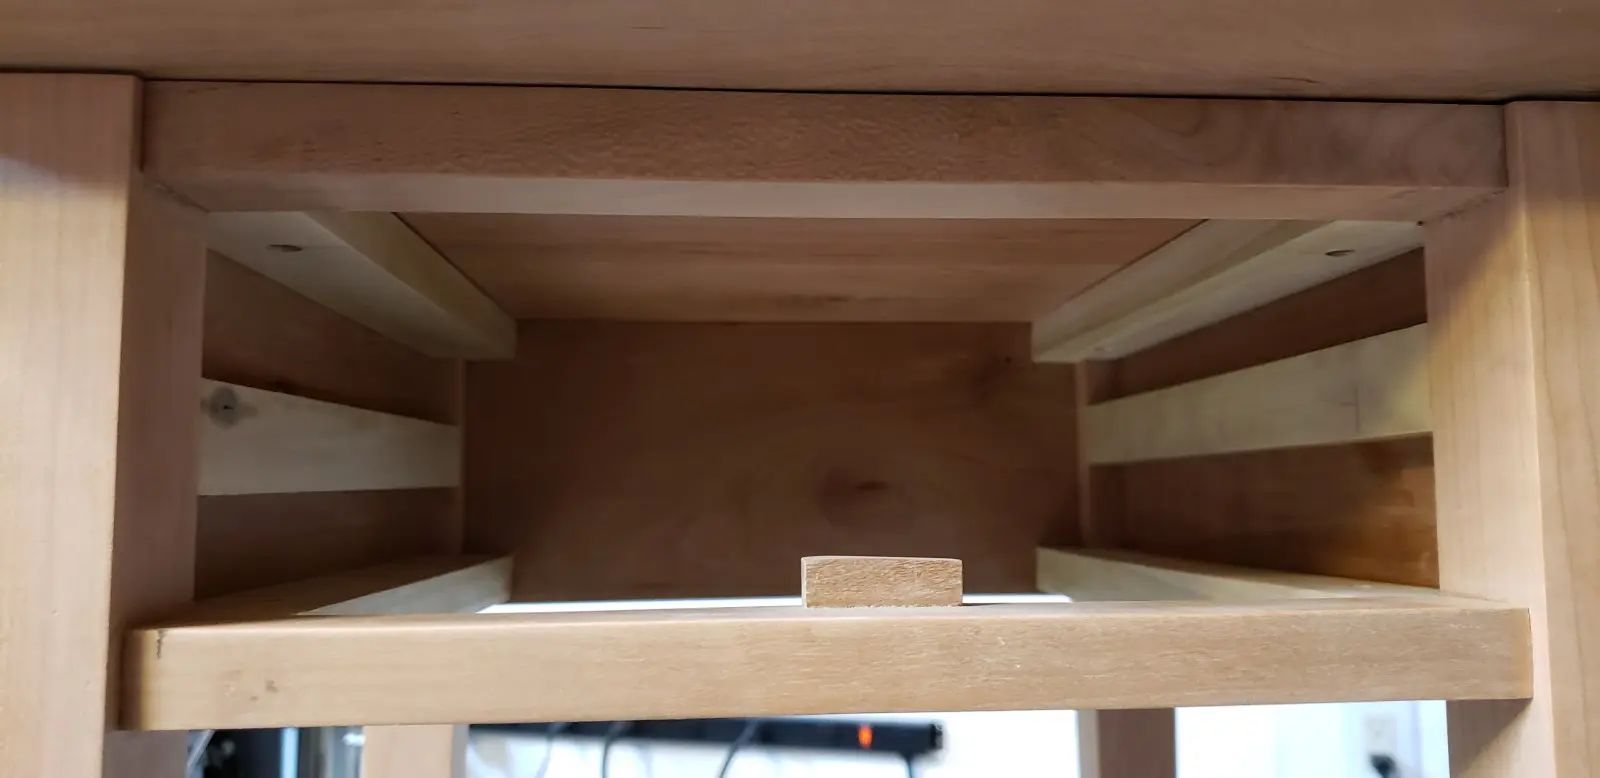
In order for the drawer to slide smoothly drawer glides and spacers are installed. Two spacers on the sides supports drawer that it would not wiggle sideways and two upper slides make sure that drawer does not fall down when you open and two bottom slides make sure that it slides horizontally in and does not fall down when drawer is closed. Here is the anatomy of the place were the drawer lives in its all beauty:
And finally the drawer was able to slide all the way in without forcing it:
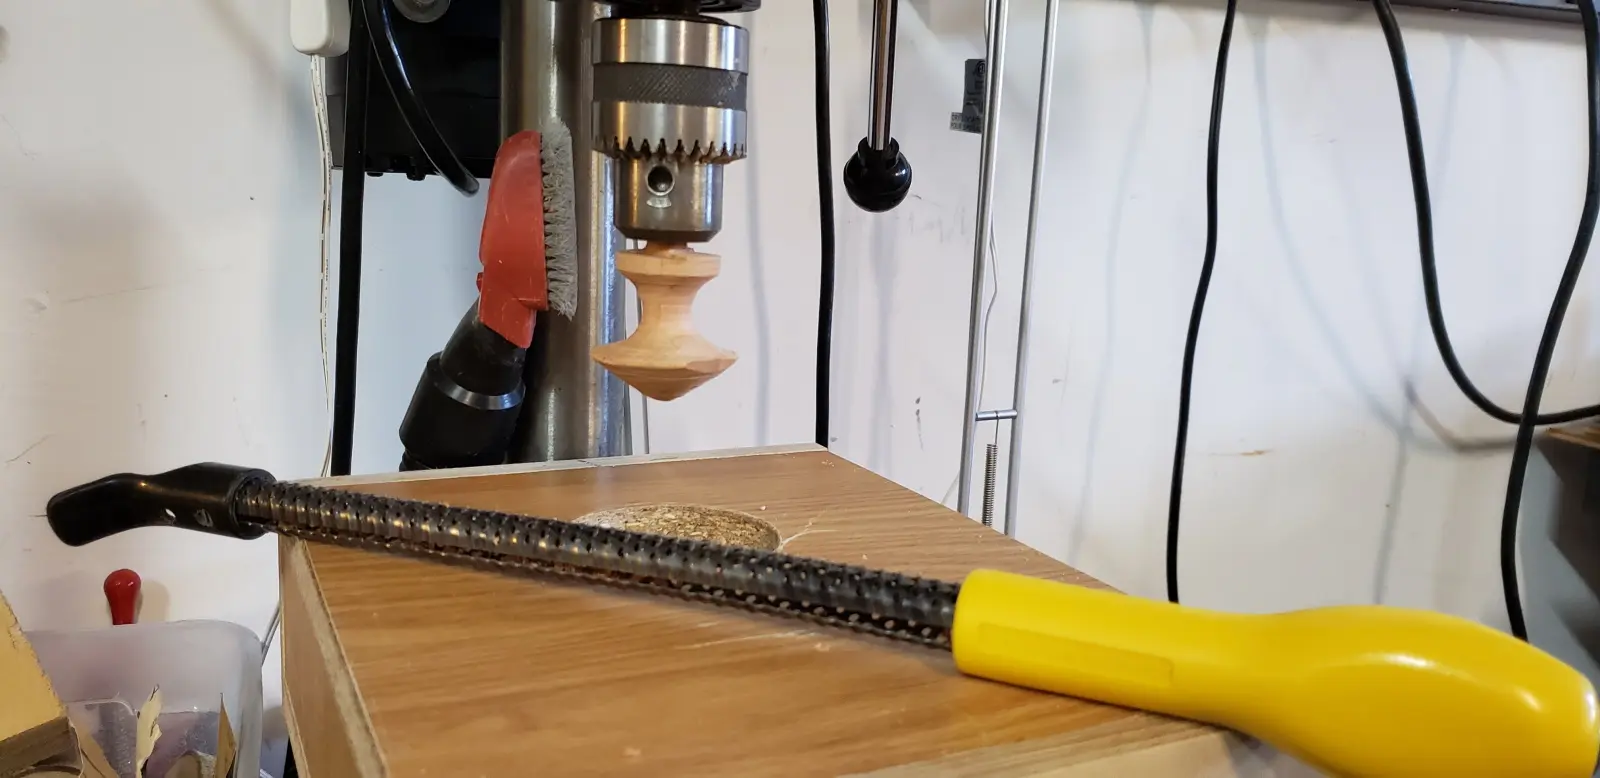
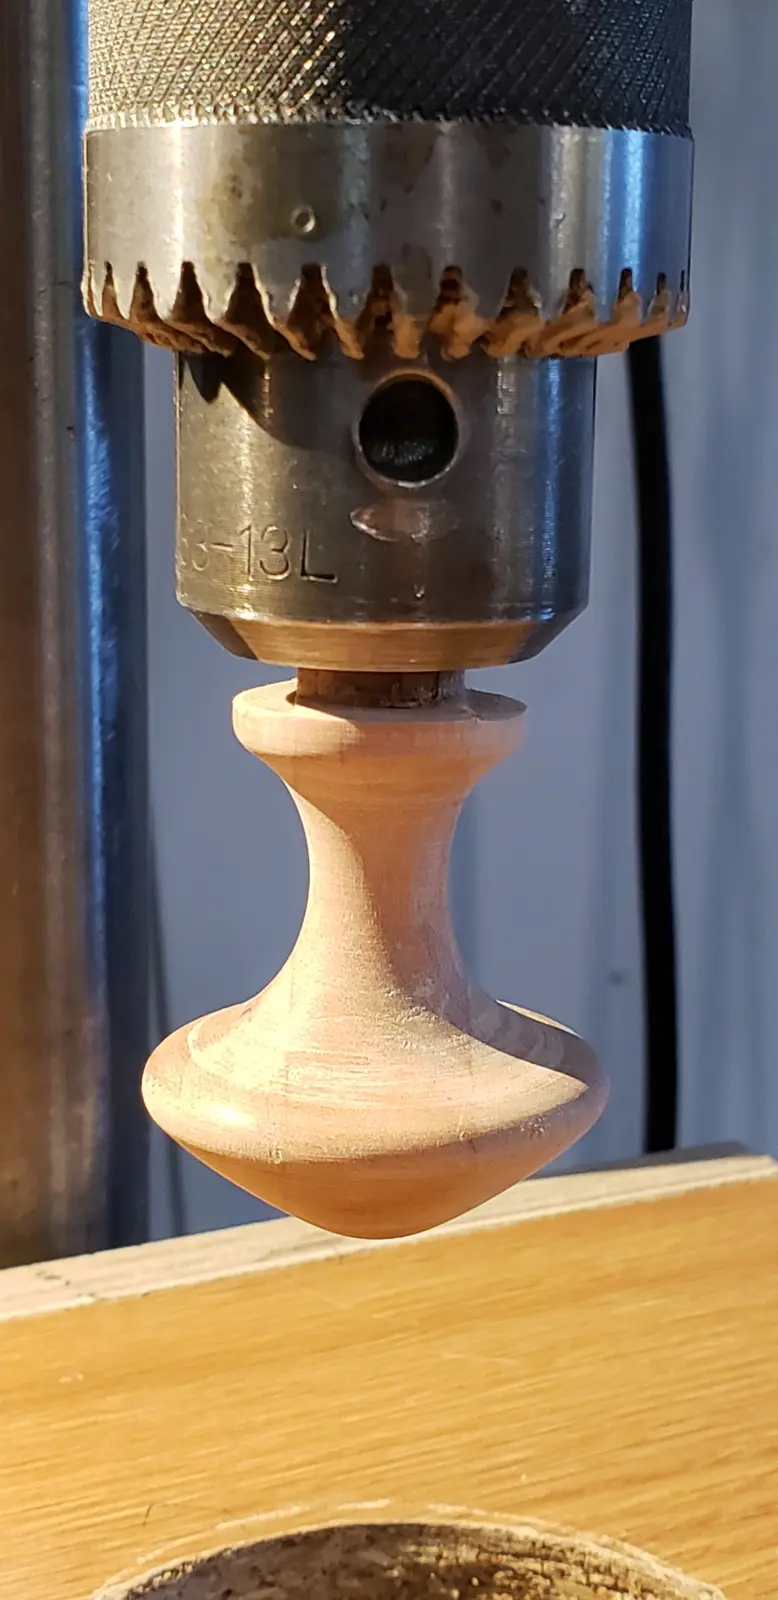
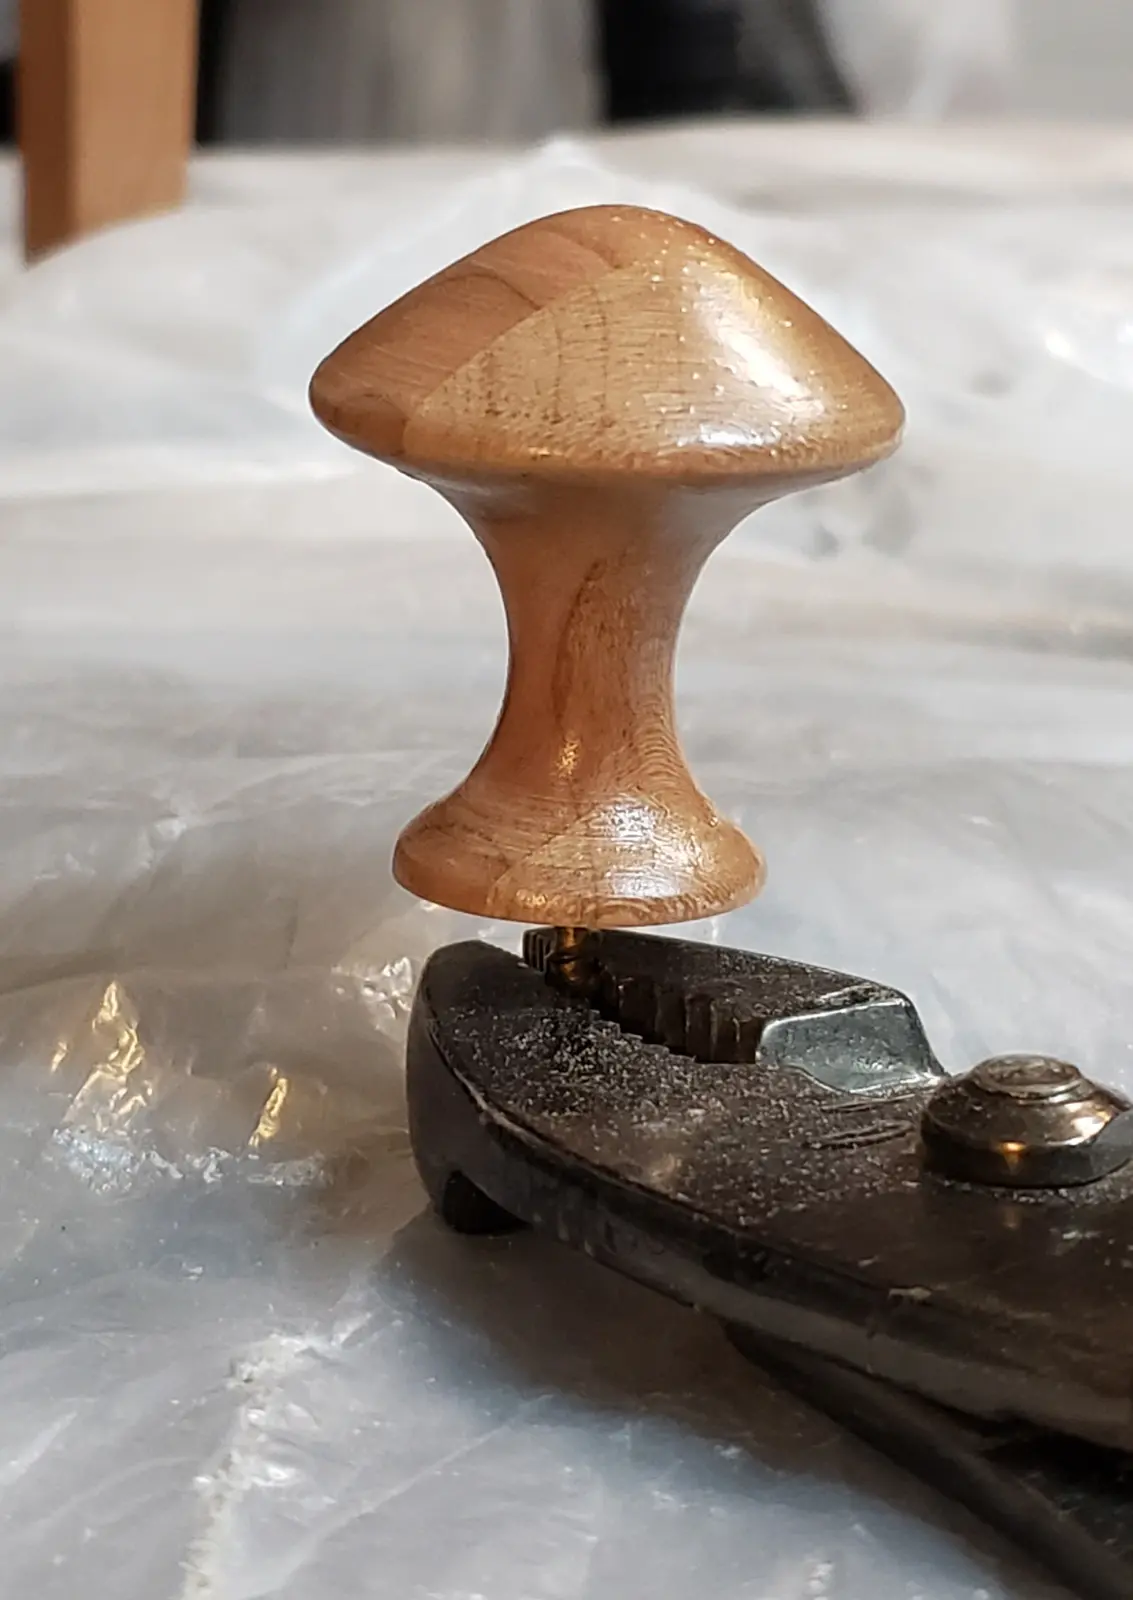
Building Shaker End Table Drawer Handle
It was time to make a drawer handle. I had a lot of fancy shims made of cherry which where leftovers from cutting tapers on the legs. So I glued three of them together. Then I thought that this would be a great use of a lathe for making a handle. Since I didn’t have one I decided to use drill press. Now the problem was that I didn’t have lathe tools, then I thought of using a round rasp, here is how it came out:
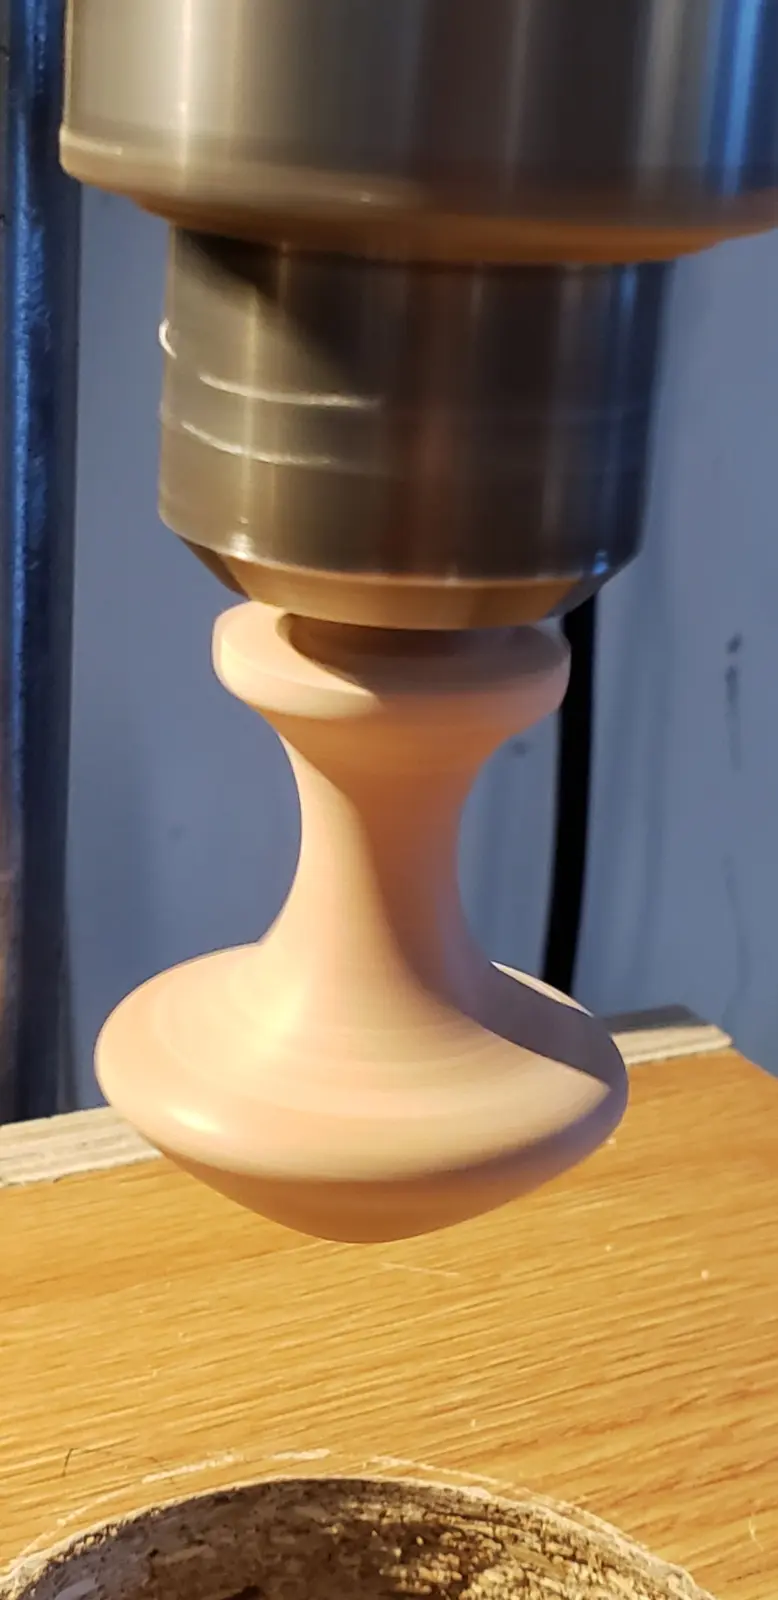
And here is a slow motion of turning a drawer handle on a drill press:
Applying Clear Coat Finish
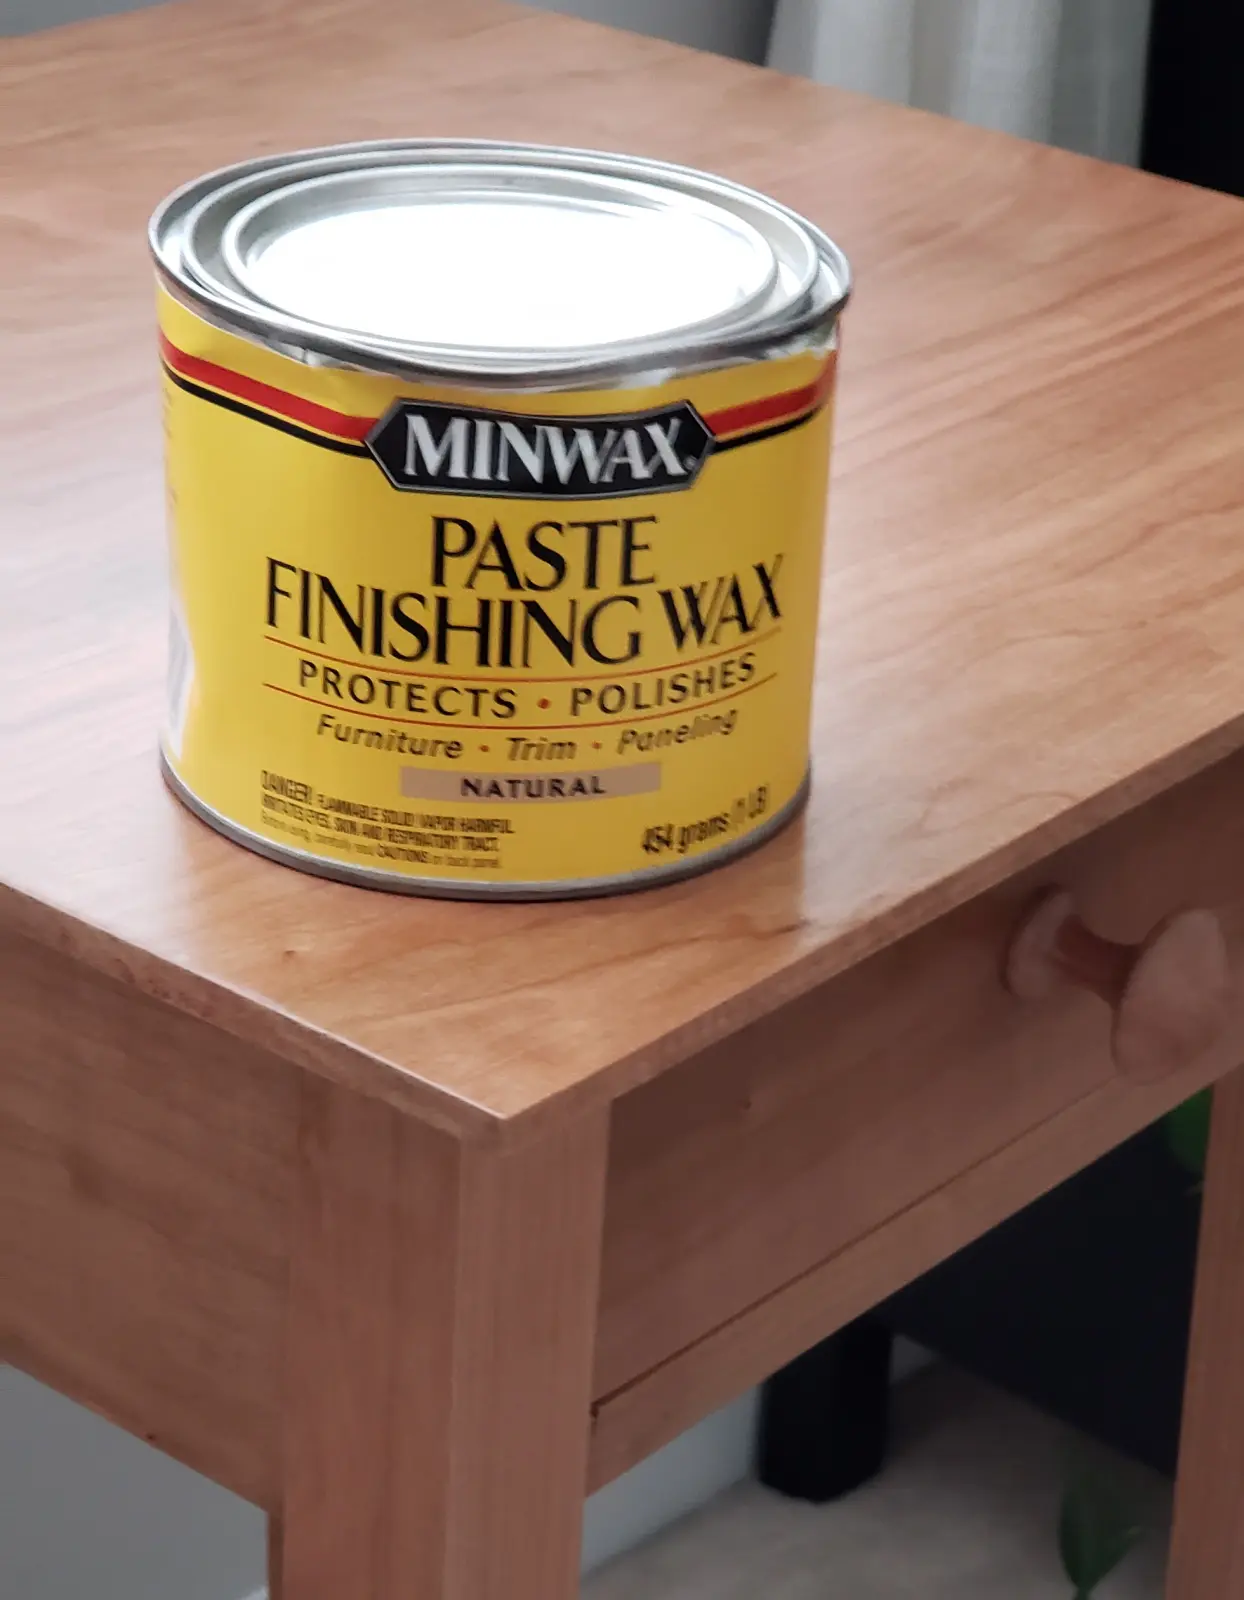
The time came for applying finish. I did not want to stain it so I chose to retain original Cherry color which I like a lot. So I went ahead and applied three coats of water based polyurethane and sanded between the coats. I have sanded with 220 grit in between the cotes and used 1000 and 2000 grit after final cote was applied which gave a very smooth to the touch finish.
After applying final top coat, the drawer was no longer operating smoothly. So I used Finishing Wax on drawer rails and after that the drawer was opening and closing as smooth as never before:
I could not believe how many tools I used to make this beautiful Shaker End Table.